• Skip to Content
  • Skip to Main Navigation
  • Skip to Search

Indiana University Indiana University IU

Open Search
  • Activities
  • Map
  • Information
  • Register Your Group
  • Science All Year
  • Sponsors

Science Fest

  • Home
  • Activities
  • Map
  • Information
  • Register Your Group
  • Science All Year
  • Sponsors
  • Search
  • Home
  • Science All Year
  • Make your own Science Notebook

Make your own Science Notebook

DIY three-hole punch notebooks, a close-up of colorful booklets with visible thread stitching.

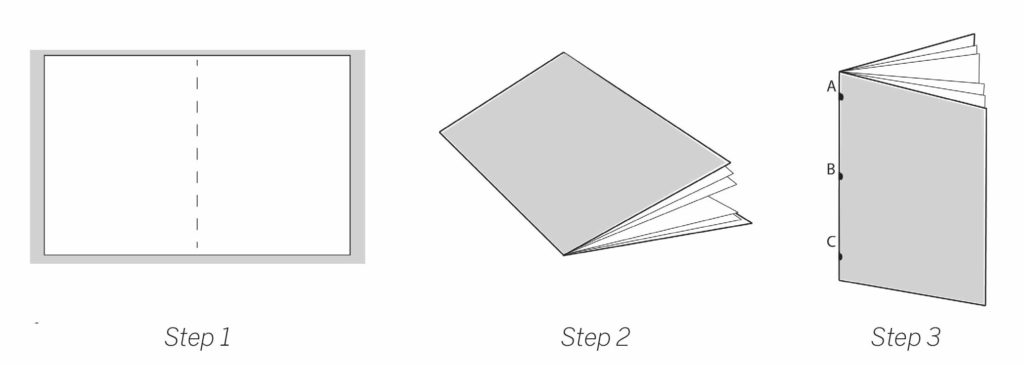
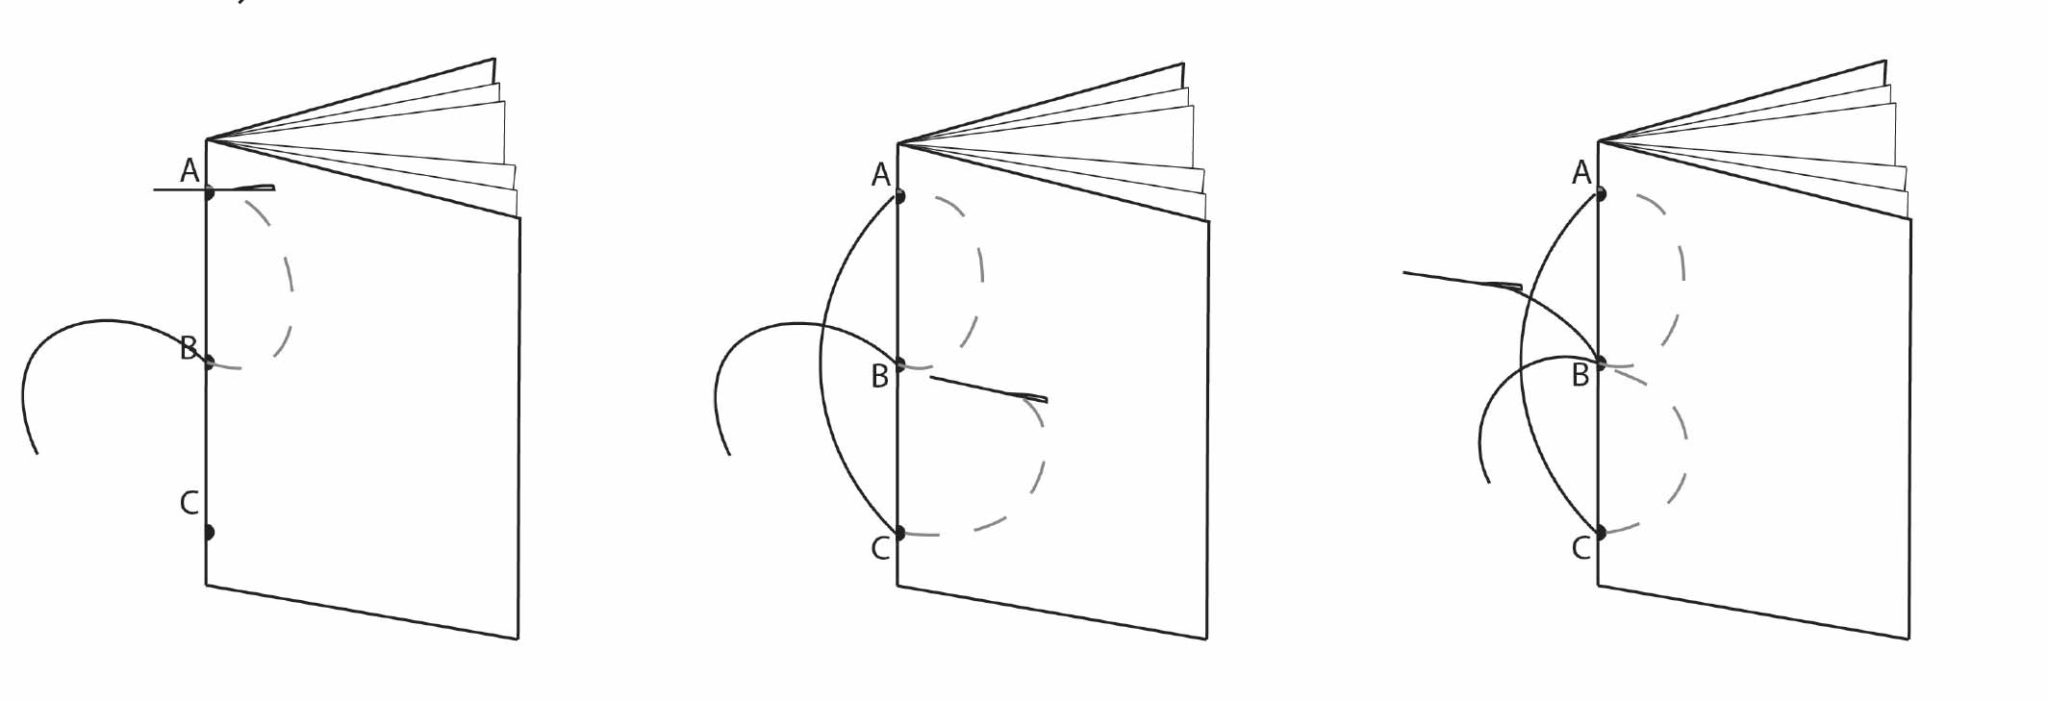
Make a 3-hole pamphlet stitch notebook.

Every scientist knows the importance of a good notebook

Science notebooks allow us to record questions, jot down observations, or sketch the world around us! Notebooks help us organize our thoughts and prepare for experiments. Notetaking allow us to improve in the future. Whether taking notes or drawing pictures, complete the following process to make your very own science notebook!

Tools

  • Awl or hole punch; or thick needle
  • Scissors
  • Needle

Materials

  • Bee’s wax or bar of soap (optional)
  • 3-5 sheets of paper for the inside
  • 1 sheet of slightly heavier or colored paper; can be slightly larger or same size (cover)
  • Thread (can use yarn, embroidery floss, heavy sewing thread, baker’s twine, etc.)

Instructions

Three-step diagram showing how to create a simple booklet or pamphlet, with a dashed line indicating a fold in the first step and hole-punch locations labeled A, B, and C in the third step.
  1. Order your papers so that the cover is at the back and the textblock pages are in front.
  2. Fold the pages in half.
  3. Once folded with papers still in a stack, make three holes along the fold: hole A about 1” from the top of the page; hole B in the middle of the page along the fold; hole C about 1” from bottom of page. Depending on your tools, you have options:
    • Use hole-punch or scissors folded to make the holes
    • Use awl or thick needle with papers to push through the pages
Instructional diagram for saddle stitching a booklet, showing a thread being pulled through a three-hole pattern.
  1. Cut a piece of thread a little more than twice the height of your book. You can choose to wax your thread at this point to make it easier to sew and hold a tighter knot: hold the thread against the wax with your thumb and gently pull the thread with your other hand so the full length is pulled against the wax; repeat process starting with the other end of the thread. Waxing the thread is not necessary, though!
  2. Time to sew! Thread the needle. Starting from the outside of the book, insert the needle through hole B (the center) to the inside. Pull until only a few inches of thread are hanging outside the book; we’ll use this to tie the knot. Then insert the needle into hole A (the top) from the inside, follow by going through hole C(bottom) from the outside, and finally insert the needle back into hole B (the center) from the inside.
Colorful, Saddle-Stitched Handouts or Booklets
  1. Once both ends of the thread are outside the book, tie a simple knot making sure to cross over the thread going down the length of the book. Trim excess to no less than ¼”.

Additional Resources

  • Download PDF of Instructions

Science Fest social media channels

  • Twitter
  • Facebook
  • YouTube
  • LinkedIn

Indiana University

Accessibility | College Scorecard | Open to All | Privacy Notice | Copyright © 2025 The Trustees of Indiana University